A Practical Guide to Using a Proxy on Chromebook
Discover how to set up a proxy on Chromebook with system settings and extensions. Our guide offers practical tips for enhanced security and performance.
Setting up a proxy on your Chromebook is simpler than you might think, and it's a powerful way to take control of your internet connection. Whether you're looking to protect your privacy, get around frustrating geo-blocks, or run a secure business operation, a proxy adds a much-needed layer of security and flexibility.
Let's dig into why this is so important and then walk through exactly how to get it done.
Why You Need a Proxy on Your Chromebook

Chromebooks are fantastic for their simplicity and cloud-first approach. They're lightweight, efficient, and perfect for professionals who handle tasks like media buying, ad verification, and large-scale data collection on the go. But that reliance on the cloud means your standard internet connection can quickly become a weak link.
Every time you connect directly, you're exposing your real IP address. For a professional, this can cause serious problems. Imagine you're a media buyer trying to verify ad placements in another country—you might get blocked or, worse, see ads targeted to your location instead of the one you're trying to check. This completely undermines the integrity of your campaign and wastes a ton of time.
Unlocking Professional Capabilities
This is where a proxy transforms your Chromebook from a simple device into a professional powerhouse. By routing your web traffic through an intermediary server, you effectively mask your true location and online identity. Using a high-quality residential proxy, for example, lets you appear as if you’re browsing from almost any city on the planet.
This unlocks critical capabilities for a range of professional tasks:
- Accurate Ad Verification: You can see exactly how your ads are being displayed in different geographic regions, ensuring your campaigns are running as intended.
- Effective Data Collection: Gathering market research or competitive intelligence from local sources becomes seamless, without your IP getting flagged or blocked for unusual activity.
- Enhanced Security: It adds a crucial layer of anonymity, protecting your operations from being snooped on by competitors or other bad actors.
For anyone working in a performance-driven industry, pairing a Chromebook with a solid proxy isn't just a nice-to-have. It's an absolute necessity for staying competitive and ensuring your data is accurate.
It’s worth remembering just how dominant the Chrome ecosystem is. With Chrome holding approximately 71.36% of the global browser market, the configurations we're discussing have a massive impact on how campaigns are delivered and tracked. Understanding the global browser usage stats really puts into perspective why mastering this setup is so crucial.
A Roadmap for Your Setup
So, where do you start? There are a few different ways to get a proxy running on a Chromebook, and the best method depends entirely on your workflow. This guide will serve as your roadmap, covering everything from system-wide settings for all-the-time use to nimble browser extensions for when you need to switch locations on the fly. We'll make sure you find the perfect fit for your needs.
How to Set Up a System-Wide Proxy in Chrome OS
The most direct route for setting up a proxy on your Chromebook is right through the system settings. This is the "set it and forget it" method. When you configure a proxy this way, it applies to your Chromebook's entire internet connection—every app, every tab, all of it gets funneled through the proxy server. No need to fiddle with individual app settings.
This approach is perfect when you need a consistent connection from a specific location for an entire work session. Think of a media buyer who needs to spend the day analyzing a campaign's performance in Germany. A system-wide setup guarantees that every single action, from refreshing a webpage to using an analytics app, appears to come from their chosen German IP. It’s the best way to prevent data contamination and keep your reports accurate.
Getting to Your Network Settings
First things first, you need to navigate to the right screen. It’s pretty straightforward.
Just click the clock in the bottom-right corner of your screen to pop open the Quick Settings panel. From there, hit the gear icon, and you'll land in the main Settings app. Look for the Network section on the left-hand menu.
This is your hub for all active connections. The trick here is that you apply the proxy to a specific network, not the device as a whole.
- Find your current Wi-Fi network and click on it.
- A details pane will appear. Scroll down a bit and expand the Proxy section.
- By default, it’ll say "Direct internet connection," which is just a fancy way of saying you aren't using a proxy.
This little section is your control panel for manually plugging in your proxy details.
Chrome OS is known for its clean, simple interface, and that design philosophy extends to its network settings, which keeps things from feeling too technical or intimidating.
Choosing Your Configuration Method
Once you're in the proxy menu, you'll face a choice: "Manual proxy configuration" or "Automatic proxy configuration." Which one you pick depends entirely on the information your proxy provider gives you.
Manual Proxy Configuration This is the most common option. You'll choose this when you have a specific IP address (or hostname) and a port number for your proxy. You'll see fields for different protocols like HTTP, HTTPS, and SOCKS. For most professional work with residential proxies, you’ll be using either HTTP or SOCKS5.
Let's jump back to our media buyer example. Let's say your provider, like ProxyPurpose, gives you a dedicated residential IP from Berlin. Here’s what you’d do:
- Select the "Manual proxy configuration" option.
- In the HTTP proxy field, enter the IP address (e.g.,
de.proxypurpose.io) and the port number (e.g.,8080). - For simplicity, you can check the box that says "Use the same proxy for all protocols."
- If your proxy requires a login, enter the username and password you were given.
Pro Tip: Tying the proxy to a single Wi-Fi network is a surprisingly powerful trick. You can have a "proxy" network (like your office Wi-Fi) and a "direct" network (like your home Wi-Fi). This lets you switch between a proxied and a direct connection just by changing which network you're connected to.
Automatic Proxy Configuration (PAC File) Sometimes, a provider—often in a corporate setting—will give you a Proxy Auto-Config (PAC) file instead. A PAC file is basically a small script that tells your Chromebook which proxy to use for different websites. It's a more dynamic setup that can, for instance, bypass the proxy for internal company sites while using it for everything else.
If you're given a PAC file URL, you'd simply choose "Automatic proxy configuration" and paste that URL into the field. Your Chromebook then takes care of all the routing rules on its own.
Why This Matters for Professionals
There's a reason Chromebooks are so popular in schools and businesses: they're secure and easy to manage. But behind the scenes, IT admins in these environments are almost always using proxies to control traffic and block threats.
For specialized work like ad verification or data collection, residential proxies are a game-changer. They allow you to seamlessly switch between geographic locations and rotate through dynamic IPs to avoid getting blocked. You can learn more about these advanced use cases in this full breakdown of proxy strategies for Chromebooks.
By setting up your proxy at the Chrome OS system level, you’re building a stable and reliable foundation for your work. It completely removes the risk of an app you forgot to configure leaking your real IP address, ensuring the integrity of your tasks from start to finish.
Using Chrome Extensions for Flexible Proxy Management
While system-wide settings provide a solid, set-it-and-forget-it proxy solution, they're not always the right tool for the job. They can feel a bit clunky and rigid. What if your work requires you to jump between geolocations multiple times an hour?
For anyone in ad verification, media buying, or competitive market research, that kind of agility is essential. This is exactly where using a proxy on Chromebook through a browser extension really shines. It’s a game-changer for dynamic workflows.
An extension works exclusively inside the Chrome browser, leaving your other apps and system services to connect directly. This targeted approach gives you the power to enable, disable, or switch your proxy settings with just a couple of clicks—right from the browser toolbar. No more digging through system menus every time you need to check a campaign in a new country.
This visual breakdown can help you decide which path makes the most sense for your needs.
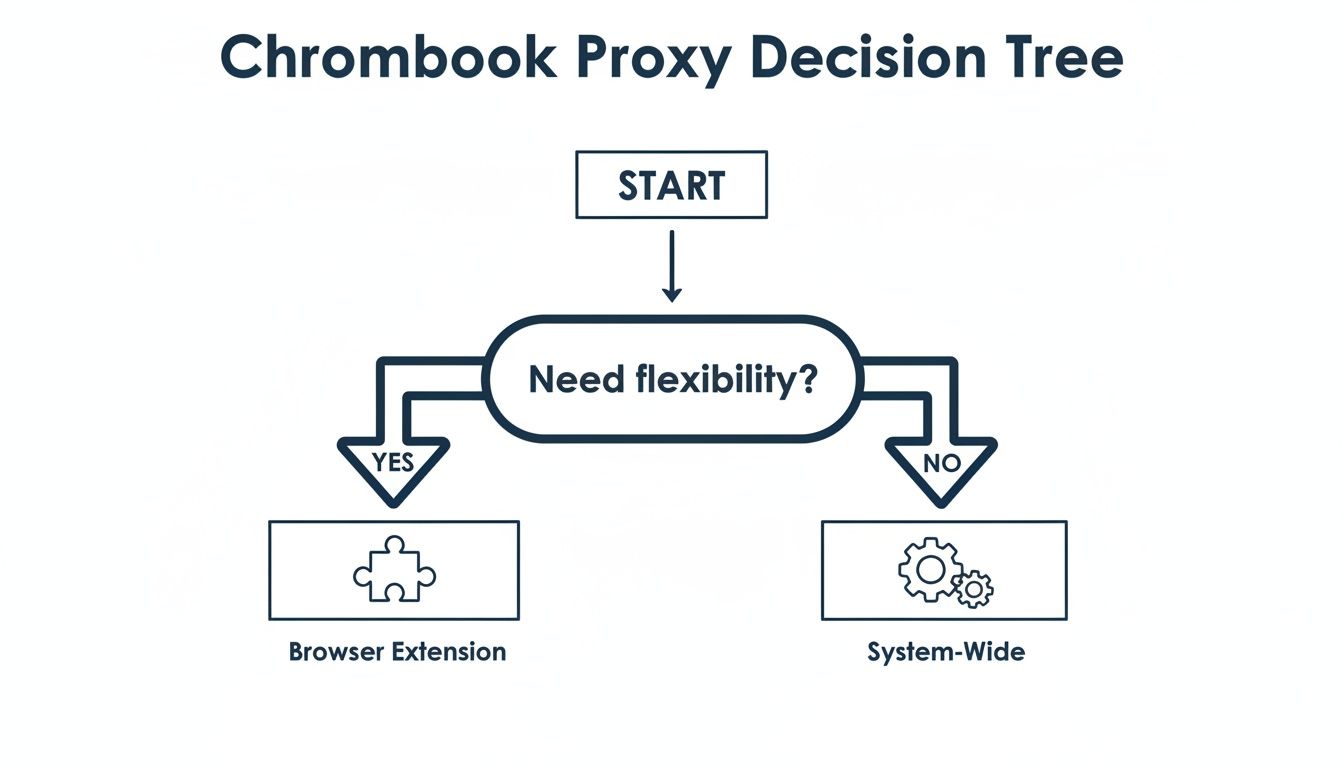
The bottom line is that your specific workflow should dictate the method. If you're making frequent changes, an extension is your best bet. For consistent, long-term connections, system settings often work just fine.
To help clarify the options, here's a quick comparison of the different ways you can set up a proxy on your Chromebook.
Comparing Proxy Configuration Methods on Chromebook
| Method | Best For | Flexibility | Complexity |
|---|---|---|---|
| System-Wide Settings | Consistent, all-app proxy usage | Low | Low |
| PAC File | Rule-based routing for specific domains | Medium | Medium |
| Chrome Extension | Quick, frequent proxy switching within the browser | High | Low |
| SSH/SOCKS Tunnel | Secure, encrypted connections for developers | High | High |
Each method has its place, but for pure speed and convenience during browser-based tasks, nothing beats a well-chosen extension.
Choosing the Right Proxy Manager Extension
The Chrome Web Store is flooded with proxy manager extensions, but honestly, many of them aren't great. A bad one can lead to a clunky user experience or, even worse, create security risks. When you're looking for an extension, you need to zero in on a few critical features that separate the professional-grade tools from the rest.
A solid extension should check these boxes:
- Intuitive Profile Management: Saving and clearly labeling different proxy configurations is a must. You should be able to flip between "Client Project - UK" and "Competitor Analysis - JP" with a single click.
- Broad Protocol Support: Make sure it supports the protocols your provider offers. At a minimum, this means HTTP/HTTPS and SOCKS5. I often lean towards SOCKS5 for its versatility with different types of traffic.
- Clear Authentication Handling: The extension needs a simple, secure way to input and save your username and password for proxies that require them.
- Regular Updates and Good Reviews: Look for extensions with recent updates and positive, detailed reviews. An actively maintained extension is a good sign that the developer cares about security and compatibility.
A well-designed proxy extension doesn't just route your traffic; it streamlines your entire workflow. The goal is to make managing your connections so effortless that it becomes an invisible part of your process, rather than a constant technical hurdle.
Setting Up Your Extension with Residential IPs
Let’s walk through a real-world example. Imagine you're an ad verification specialist, and you need to check ad placements in both France and Canada for a client. For this kind of work, you're using ProxyPurpose to get dedicated residential IPs, which give you high trust scores and reliable connections.
First, you'll need to find and install a reputable proxy manager extension from the Chrome Web Store. Once it's installed, you'll see its icon pop up in your browser's toolbar. Clicking it opens the management panel where you can start setting things up.
Creating Your First Profile (France):
- Open the extension’s options and find the "Add New Profile" or similar button.
- Give the profile a name you'll immediately recognize, like "Ad Verification - France."
- Choose the right protocol (let's say HTTP for this example).
- Copy and paste the server address and port that ProxyPurpose provided for your French residential IP.
- Enter your username and password into the authentication fields.
- Save the profile.
Creating a Second Profile (Canada): Now, just do it again for your Canadian IP. Name this one "Ad Verification - Canada" and plug in the corresponding server details. In just a couple of minutes, you've built two distinct, easy-to-access proxy profiles.
With this configuration, switching your virtual location is instant. Need to check the French ads? Click the extension icon and activate the "Ad Verification - France" profile. Time to review the Canadian campaign? A quick switch to the "Ad Verification - Canada" profile is all it takes.
Practical Tips for an Efficient Workflow
Getting your profiles set up is just the start. Building an efficient workflow around your extension is what really saves time and prevents errors. Clear labeling is step one, but you can get even more organized.
I highly recommend grouping profiles by client, campaign, or specific task. For example, a naming convention like [ClientName] - [Country] - [Task] works wonders. This level of organization helps prevent costly mistakes, like accidentally checking a campaign from the wrong geolocation, which could skew your data and waste ad spend. This structured approach to managing your proxy on Chromebook turns a simple browser tool into a serious asset for operational accuracy.
Advanced Proxy Setups for Technical Professionals
For developers, security pros, and anyone needing more granular control, a Chromebook offers some surprisingly powerful, lower-level proxy configurations. When the standard system settings or a browser extension just won't cut it, you can dive deeper, especially within the Linux development environment.
These techniques are essential for tasks that demand encrypted connections or need to integrate with command-line tools. They turn a simple Chromebook into a seriously capable machine for secure development, web scraping, and complex automation.
<iframe width="100%" style="aspect-ratio: 16 / 9;" src="https://www.youtube.com/embed/4N6Poyb02ws" frameborder="0" allow="autoplay; encrypted-media" allowfullscreen></iframe>Building a Secure SOCKS Proxy with an SSH Tunnel
One of the most robust ways to secure your traffic is by creating an SSH tunnel. Think of it as your own private, encrypted highway. You use a secure SSH connection to a remote server, and that server acts as a local SOCKS proxy for your Chromebook.
This is a whole different ballgame compared to a standard HTTP proxy. Instead of simply masking your IP, an SSH tunnel wraps the entire data stream between your Chromebook and the remote server in a layer of strong encryption. It's an absolute must-have if you're working on an untrusted network, like the Wi-Fi at a coffee shop, and need to guarantee no one is snooping on your data.
A perfect real-world scenario? A developer needing to connect to a sensitive production database. By tunneling their connection through an SSH server, they create a secure SOCKS proxy. This ensures that their login credentials and any data they're working with are completely invisible to anyone on the local network.
Setting this up happens right in the Linux terminal on your Chromebook. The goal is to establish a persistent, secure connection that you can then point specific applications to use.
Getting Proxies to Work with Linux Applications
The integrated Linux environment on Chrome OS is fantastic for running command-line tools and development software. The catch? These tools live in their own world and completely ignore the system-wide proxy settings you configured in Chrome OS. To get them on board, you need to use environment variables.
This is standard operating procedure for any Linux-based system, and it works perfectly on a Chromebook. You'll primarily be working with three variables: http_proxy, https_proxy, and no_proxy. By defining these in your shell's startup file (like .bashrc or .zshrc), you tell all your command-line utilities to route their traffic through your proxy.
Imagine a data scientist using a Python script to gather information from dozens of websites. Their IP address would get flagged and blocked in no time.
By setting environment variables, they can solve this instantly. In their terminal, they would export the variables like so:
export http_proxy="http://user:pass@proxy.proxypurpose.io:8080"export https_proxy="http://user:pass@proxy.proxypurpose.io:8080"
With those lines in place, tools like curl, wget, and Python libraries like requests automatically pick up the proxy settings for every network request. This lets the data scientist tap into a pool of dedicated residential IPs from a provider like ProxyPurpose, making sure their scraping job runs without a hitch.
Mastering environment variables is the key to fully integrating proxy settings into your development workflow. It makes using a proxy on a Chromebook for heavy-duty, automated tasks just as powerful as it would be on a dedicated Linux workstation.
This level of command-line control is what truly elevates the Chromebook from a simple web browser into a legitimate tool for professionals. You can handle everything from secure remote server administration to large-scale data collection, all within the fast and secure confines of Chrome OS.
Keeping Your Proxy Connection Secure and Fast
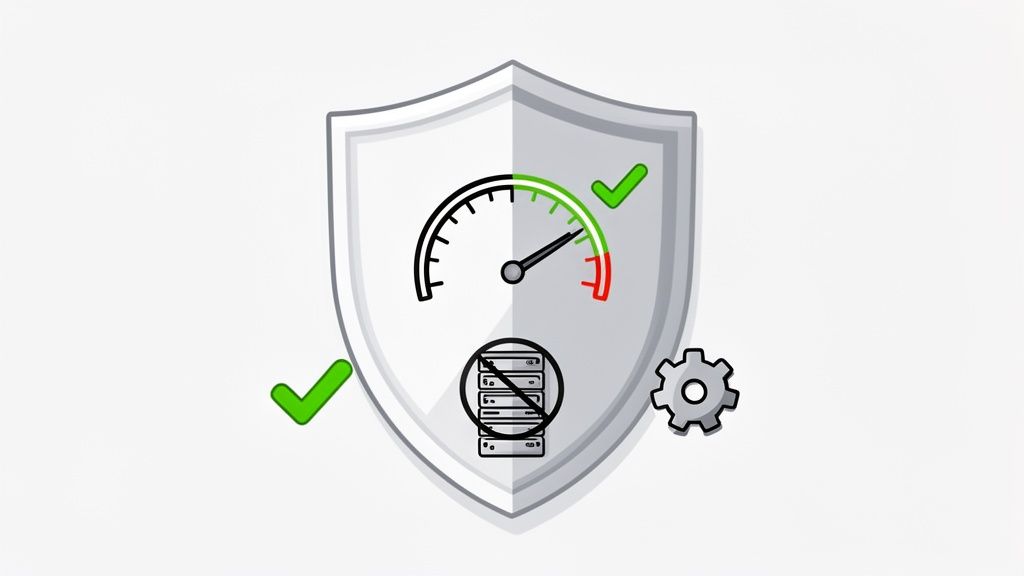
Getting a proxy up and running on your Chromebook is really just the beginning. To truly make it work for you—especially for high-stakes tasks like media buying or checking ad placements—you have to actively manage its security and performance.
A poorly configured or low-quality proxy can do more harm than good. It might open up new security holes, drag your connection to a crawl, and completely defeat the purpose of using one in the first place. This means we need to shift our thinking from how to set up a proxy to how to use it right.
Always Go for Secure Protocols
When you're plugging in your proxy details, you'll usually see choices like HTTP, HTTPS, and SOCKS. A basic HTTP proxy might seem fine for simple browsing, but it sends all your data in plain text. Anyone snooping on the network can see it, making it a total non-starter for anything sensitive.
For professional work, you absolutely need encryption. Here's what to look for:
- HTTPS: This is the baseline. It wraps your web traffic in an SSL/TLS security layer, encrypting the data between your Chromebook and the proxy server.
- SOCKS5: This is almost always the better choice for professional use. It’s more versatile than HTTP, handling all kinds of traffic, not just web pages. More importantly, SOCKS5 supports strong authentication and encryption, giving you a much higher level of security.
Bottom line: If you see an option for SOCKS5, use it. It's a simple best practice that makes a big difference.
The Hidden Dangers of "Free" Public Proxies
It's tempting to grab a free proxy from a public list, but the risks are just too high. These services are notorious for being slow and unreliable, but the real problem is that they're often incredibly dangerous. Many are run by people looking to steal your data, inject their own ads into your browser, or even distribute malware.
A free public proxy isn't a product; you are the product. Your browsing history, login credentials, and personal data become the currency you're paying with.
Don't just take my word for it. One study found that a staggering 79% of free proxy providers didn't even use HTTPS encryption, and many were actively modifying the websites users were visiting. For a media buyer, that's not just a privacy issue—it's an operational disaster waiting to happen.
Make Sure Your Connection Isn't Leaking Data
So, your proxy is running. But how can you be sure it’s actually protecting you and not leaking your real information? The two biggest culprits are DNS leaks and browser fingerprinting.
A DNS leak happens when your Chromebook bypasses the proxy to ask for a website's IP address, sending the request straight to your local internet provider and giving away your true location.
Browser fingerprinting is a sneakier threat. Websites can build a unique "fingerprint" of your device by collecting details like your browser version, screen resolution, installed fonts, and plugins. Chrome OS can have a very consistent fingerprint, making you easier to track across the web.
This is where professional-grade tools come in. A high-quality provider like ProxyPurpose builds in features like Shield Protection to actively block DNS leaks and help scramble your browser fingerprint. This keeps your anonymity intact, which is absolutely critical for accurate geo-targeting and campaign verification.
The need for this level of protection is growing as people become more aware of browser data collection. Concerns have shot up after studies revealed just how much information browsers are grabbing. Chrome, for example, has been found to collect up to 19 different types of user data. You can read more about the findings on browser privacy risks to see why robust proxy protection is no longer just a nice-to-have.
Use Smart Routing for Better Performance
Finally, speed matters. A slow proxy can bring your entire workflow to a halt, turning a quick check into a frustrating wait. Generic proxy services often cram too many users onto overloaded servers, resulting in high latency and dropped connections.
This is where smart routing and dedicated IPs completely change the game. Instead of sharing a crowded connection, a dedicated residential IP from a service like ProxyPurpose gives you a clean, exclusive line. This immediately cuts down on the risk of being blocked and boosts your overall speed.
Behind the scenes, an intelligent routing system automatically finds the fastest, most reliable path for your data. This ensures your requests are handled with minimal delay, which is essential for time-sensitive tasks like verifying ad placements where every second counts.
Got Questions About Chromebook Proxies? We've Got Answers.
Even after you've got your proxy set up on your Chromebook, a few questions tend to pop up. Let's tackle some of the most common ones I hear from users, clearing up everything from performance worries to frustrating connection hiccups.
Is a Proxy Going to Clobber My Chromebook’s Speed?
It's a fair question. The honest answer is: it depends. But a good proxy shouldn't make your connection crawl.
Any time you route your traffic through another server, you're adding an extra step to the journey. A tiny bit of latency is inevitable. The real difference comes down to the quality of the proxy you're using.
- Free or overloaded public proxies? Yeah, those will almost definitely slow you down. They often cram far too many people onto underpowered servers, making them painfully slow and unreliable.
- Premium residential proxies, on the other hand, are a different beast entirely. Providers like ProxyPurpose build their networks for speed, using smart routing and dedicated IPs to keep latency to an absolute minimum. For everyday browsing, you likely won't even notice a difference.
If you're doing professional work like media buying, that minuscule speed trade-off is well worth the huge gains in security and accurate geo-targeting.
The point isn't just to be anonymous; it's to work effectively. A premium proxy finds that sweet spot between speed and security. A free one usually ends up giving you neither.
What's the Real Difference Between HTTP and SOCKS5 Proxies?
Think of it like this: HTTP and SOCKS5 proxies are two different kinds of delivery services for your internet traffic. They both get the job done, but one is far more flexible and secure.
An HTTP proxy is a specialist. It’s built specifically for web traffic—anything that starts with http:// or https://. It understands the content of that traffic and can sometimes even cache it to speed things up.
A SOCKS5 proxy is more of a universal carrier. It works at a much lower level and doesn't really care what it's carrying. Whether it's web browsing, an email client, a game, or some specific development tool, it just passes the data along. This makes it incredibly versatile. More importantly, SOCKS5 supports better authentication and encryption, which is why it's the go-to choice for anyone serious about security.
Help! Why Won't My Chromebook Connect Through the Proxy?
It’s incredibly frustrating when your connection just drops. Nine times out of ten, though, it's one of a few simple issues. Before you tear your hair out, run through this quick mental checklist.
- Check Your Credentials. I can't tell you how many times this is the culprit. A single typo in the username, password, server address, or port number will stop you cold. Go back and double-check every single character.
- Is the Network Blocking You? The Wi-Fi network you're connected to might be blocking the specific port your proxy needs. This is super common on corporate or public Wi-Fi. A quick way to test this is to switch to a different network, like your phone's hotspot, and see if it connects.
- Is the Proxy Server Online? It's possible the server itself is temporarily down. Any decent provider will have a status page where you can check for outages or planned maintenance.
- Did You Authorize Your IP? Many proxy services need you to authorize your current IP address in their dashboard before you can connect. If your real IP address has changed (which can happen when you reboot your router or switch networks), you might just need to log in and update it.
Working through these common points of failure usually gets you back online in just a couple of minutes.
Ready to stop wasting time with unreliable connections and blocked IPs? ProxyPurpose provides dedicated, clean residential IPs with smart routing and Shield Protection, purpose-built for media buying and ad verification. Get started with ProxyPurpose today and see how seamless a professional proxy can be.